Master SaaS Subscription Management with Next.js
Learn how to implement a robust SaaS subscription management system using Next.js. This guide covers everything from database design to payment integration and customer portals, ensuring a seamless experience for both developers and users.

Zakariae
Building a subscription billing system from scratch can consume months of development time and introduce countless edge cases that distract you from your core product. For developers working with Next.js, the combination of React Server Components, Server Actions, and modern payment integrations creates an ideal foundation for subscription management. This comprehensive guide walks you through every aspect of implementing robust saas subscription management in your Next.js application, from database design to webhook handling and customer portal functionality.
Whether you are launching your first SaaS product or scaling an existing platform, understanding how to architect subscription systems properly will save you significant technical debt down the road. We will cover the complete implementation journey, including plan configuration, payment processing, subscription lifecycle events, usage tracking, and the administrative tools you need to manage your subscriber base effectively.
Key Takeaways
- Database schema design is foundational: structure your tables to support multi-tenant organizations, tiered plans, and subscription state transitions from day one.
- Webhook reliability determines billing accuracy: implement idempotent handlers with retry logic to ensure no payment events are missed or duplicated.
- Customer self-service portals reduce support burden: allow users to upgrade, downgrade, cancel, and update payment methods without contacting your team.
- Server Actions in Next.js 15 simplify billing logic: handle sensitive operations securely without exposing API endpoints to the client.
- Metered and usage-based billing requires real-time tracking: implement efficient systems for recording and aggregating usage data.
- Testing subscription flows before launch prevents revenue loss: use sandbox environments to simulate every subscription lifecycle scenario.
Understanding Subscription Management Architecture
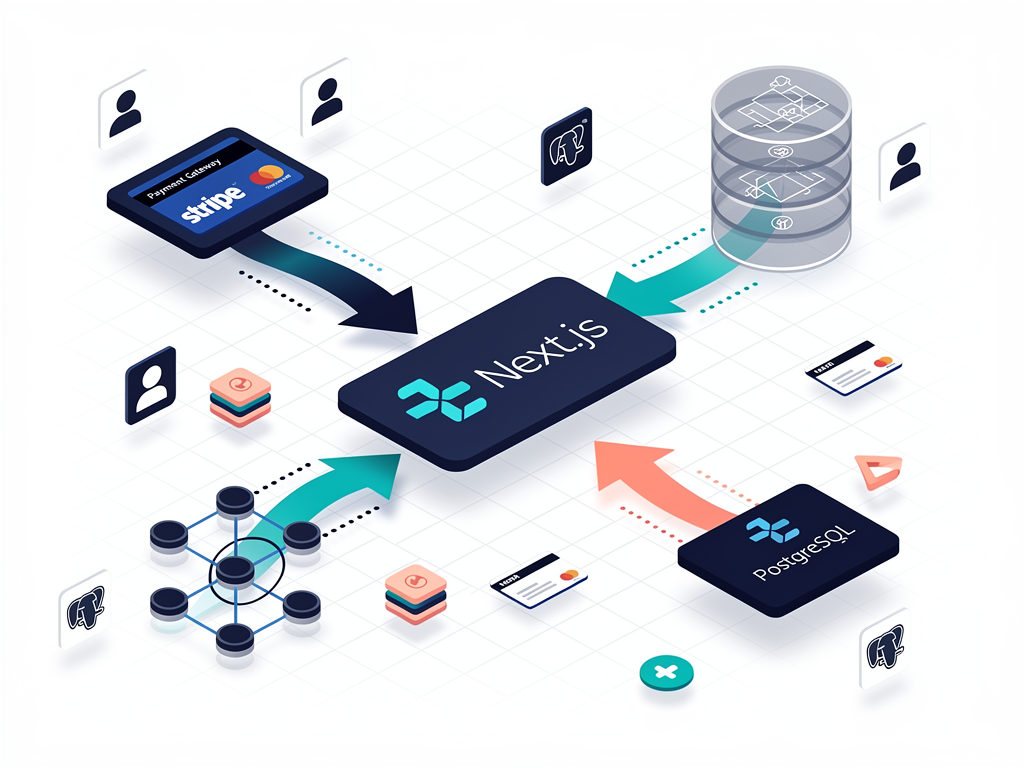
Before writing any code, you need a clear mental model of how subscription management systems work. At the highest level, your application must coordinate between three primary systems: your application database, your payment processor, and your user interface. Each system maintains its own state, and keeping these synchronized is the central challenge of subscription management.
Your application database stores the canonical record of what features each user can access. This includes their current plan, billing cycle dates, usage limits, and organization membership. When a user logs in, your application queries this data to determine their permissions and capabilities. The database must be designed to handle plan changes, grace periods, and historical billing records.
The payment processor (typically Stripe, Lemon Squeezy, or Paddle) manages the actual financial transactions. It stores payment methods, processes charges, handles failed payments, and manages subscription state transitions. Your payment processor is the source of truth for billing events, which it communicates to your application through webhooks.
Your user interface presents subscription options, displays current plan status, and allows customers to manage their billing. This includes pricing pages, checkout flows, billing portals, and usage dashboards. The UI must accurately reflect the current state from your database while handling asynchronous updates from payment events.
The synchronization between these systems happens primarily through webhooks. When a customer completes a checkout, upgrades their plan, or has a payment fail, your payment processor sends a webhook to your application. Your webhook handler then updates your database to reflect the new state. This event-driven architecture ensures your application always reflects the true billing status.
Designing Your Database Schema for Subscriptions
A well-designed database schema is the foundation of reliable subscription management. You need tables that capture organizations, users, plans, subscriptions, and billing history. The schema must support common scenarios like team billing, plan migrations, and subscription pauses while remaining queryable for analytics and reporting.
Start with your organizations table, which represents the billable entity in your system. Even if you are building a single-user product initially, designing for organizations from the start makes future team features much easier to implement:
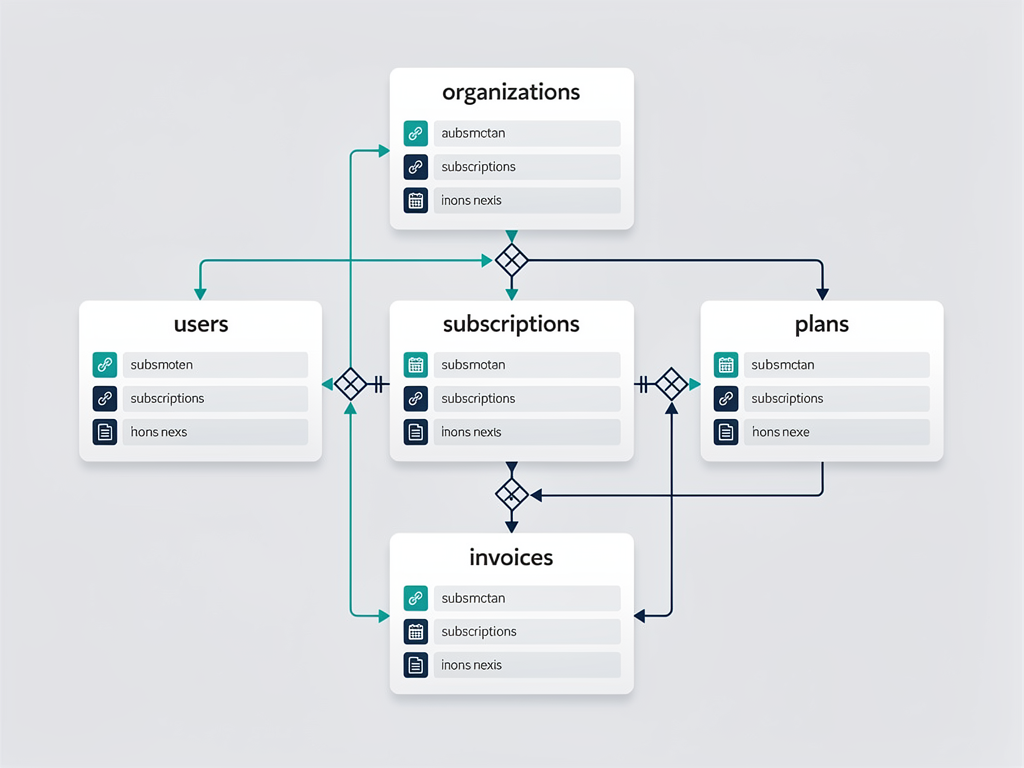
Your plans table stores the configuration for each subscription tier. This includes pricing, billing intervals, feature flags, and usage limits. Keep your plans table in your database rather than hardcoding values, as this allows you to modify plan details without deploying code changes:
| Field | Type | Purpose |
|---|---|---|
| id | UUID | Primary key |
| name | TEXT | Display name (e.g., "Professional") |
| stripe_price_id | TEXT | Reference to payment processor |
| price_monthly | INTEGER | Price in cents |
| price_yearly | INTEGER | Annual price in cents |
| features | JSONB | Feature flags and limits |
| is_active | BOOLEAN | Whether plan is available for new signups |
The subscriptions table links organizations to plans and tracks the current billing state. This table should mirror the subscription object from your payment processor while adding application-specific fields:
Pro Tip: Store both the payment processor's subscription ID and your internal subscription ID. This dual-reference system makes debugging webhook issues much easier and allows you to correlate events across systems.
Include fields for status (active, past_due, canceled, trialing), current_period_start and current_period_end timestamps, cancel_at_period_end boolean, and trial_end date. These fields allow your application to make authorization decisions without querying your payment processor on every request.
Setting Up Stripe Integration in Next.js
Stripe remains the most popular payment processor for SaaS applications due to its comprehensive API, excellent documentation, and developer-friendly tools. Setting up Stripe in a Next.js application involves installing the SDK, configuring environment variables, and creating utility functions for common operations.
Begin by installing the required packages. You will need both the server-side Stripe SDK and the client-side Stripe.js library for secure payment element rendering:
Configure your environment variables with your Stripe API keys. Use test mode keys during development and switch to live keys only in production. Your webhook signing secret is essential for verifying that incoming webhooks genuinely originate from Stripe:
| Environment Variable | Purpose | Where to Find |
|---|---|---|
| STRIPE_SECRET_KEY | Server-side API authentication | Stripe Dashboard > Developers > API Keys |
| STRIPE_PUBLISHABLE_KEY | Client-side initialization | Stripe Dashboard > Developers > API Keys |
| STRIPE_WEBHOOK_SECRET | Webhook signature verification | Stripe Dashboard > Developers > Webhooks |
| STRIPE_PRICE_ID_STARTER | Reference for Starter plan | Stripe Dashboard > Products |
| STRIPE_PRICE_ID_PRO | Reference for Professional plan | Stripe Dashboard > Products |
Create a centralized Stripe client utility that initializes the SDK with your secret key. This utility should be imported wherever you need to make Stripe API calls on the server side. Using a singleton pattern prevents creating multiple Stripe instances:
For the client side, create a separate utility that loads Stripe.js asynchronously. This ensures the Stripe library only loads when needed and does not block your initial page render. The loadStripe function from the @stripe/stripe-js package handles this efficiently.
Implementing Checkout Flows with Server Actions
Next.js 15 Server Actions provide an elegant way to handle checkout initiation securely. Instead of creating separate API routes, you can define server-side functions that are called directly from your client components. This approach simplifies your codebase while maintaining security, as the server action code never reaches the browser.
Your checkout flow begins when a user selects a plan on your pricing page. The Server Action creates a Stripe Checkout Session with the appropriate price ID, success and cancel URLs, and customer metadata. If the user already has a Stripe customer ID stored in your database, include it to maintain their payment history:
The checkout session configuration includes several important options. Set mode to "subscription" for recurring billing. Include allow_promotion_codes if you want customers to apply discount codes. The subscription_data object lets you configure trial periods and metadata that will be attached to the resulting subscription.
Important: Always include the user's internal ID in the checkout session metadata. This allows your webhook handler to associate the resulting subscription with the correct user account, even if the customer's email differs from their account email.
After creating the session, redirect the user to Stripe's hosted checkout page. This page handles payment method collection, validation, and 3D Secure authentication. Once payment succeeds, Stripe redirects the user to your success URL while simultaneously sending webhooks to your application.
Your success page should display a confirmation message but should not grant access to paid features immediately. Wait for the webhook to update your database before enabling premium functionality. This prevents issues where the redirect arrives before the webhook, which can happen under high load.
Building Webhook Handlers for Subscription Events
Webhooks are the backbone of subscription management. Every significant billing event, from successful payments to failed charges to subscription cancellations, arrives at your application through webhooks. Building reliable webhook handlers requires careful attention to security, idempotency, and error handling.
Create a dedicated API route for Stripe webhooks in your Next.js application. This route must read the raw request body (not parsed JSON) to verify the webhook signature. Stripe signs each webhook with your webhook secret, and verifying this signature ensures the request genuinely came from Stripe:
Your webhook handler should process multiple event types. The most critical events for subscription management include:
- checkout.session.completed: A customer completed checkout. Create or update the subscription record in your database.
- customer.subscription.created: A new subscription was created. Store the subscription details and enable access.
- customer.subscription.updated: Subscription details changed. Update plan, status, or billing cycle dates.
- customer.subscription.deleted: Subscription was canceled. Revoke access and update status.
- invoice.payment_succeeded: A recurring payment succeeded. Update billing history and extend access.
- invoice.payment_failed: A payment failed. Notify the customer and potentially restrict access.
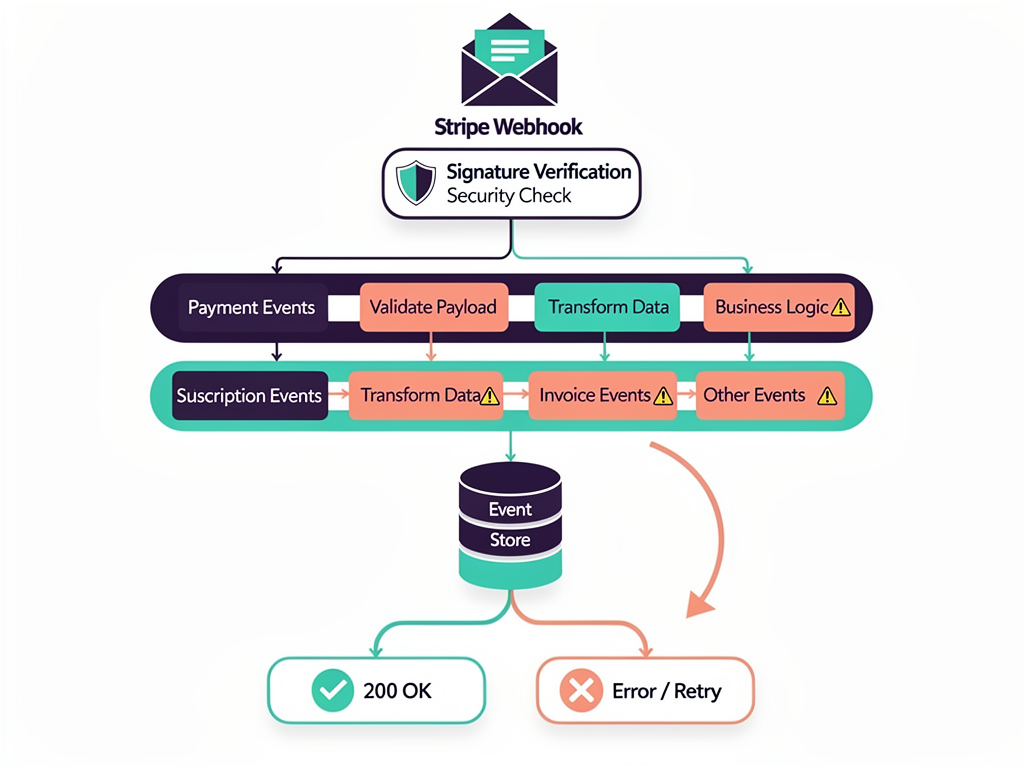
Implement idempotency in your webhook handlers by tracking processed event IDs. Stripe may send the same webhook multiple times if your endpoint does not respond quickly enough or returns an error. Store each processed event ID in your database and skip processing if you have already handled that event:
Return a 200 status code as quickly as possible, even if you need to perform additional processing. Stripe considers webhooks failed if they do not receive a response within 20 seconds. For complex operations, acknowledge the webhook immediately and process the event asynchronously using a job queue.
Creating Customer Self-Service Portals
A self-service billing portal dramatically reduces support requests and improves customer satisfaction. Users expect to manage their subscriptions independently, including upgrading plans, updating payment methods, viewing invoices, and canceling service. Stripe provides a hosted Customer Portal that handles most of these functions with minimal implementation effort.
Configure the Customer Portal in your Stripe Dashboard under Settings > Billing > Customer Portal. Enable the features you want to offer, including subscription cancellation, plan switching, payment method updates, and invoice history. You can customize the portal's appearance to match your brand colors and logo.
Create a Server Action that generates a portal session URL for the current user. This URL is temporary and should be generated on demand when the user clicks a "Manage Billing" button:
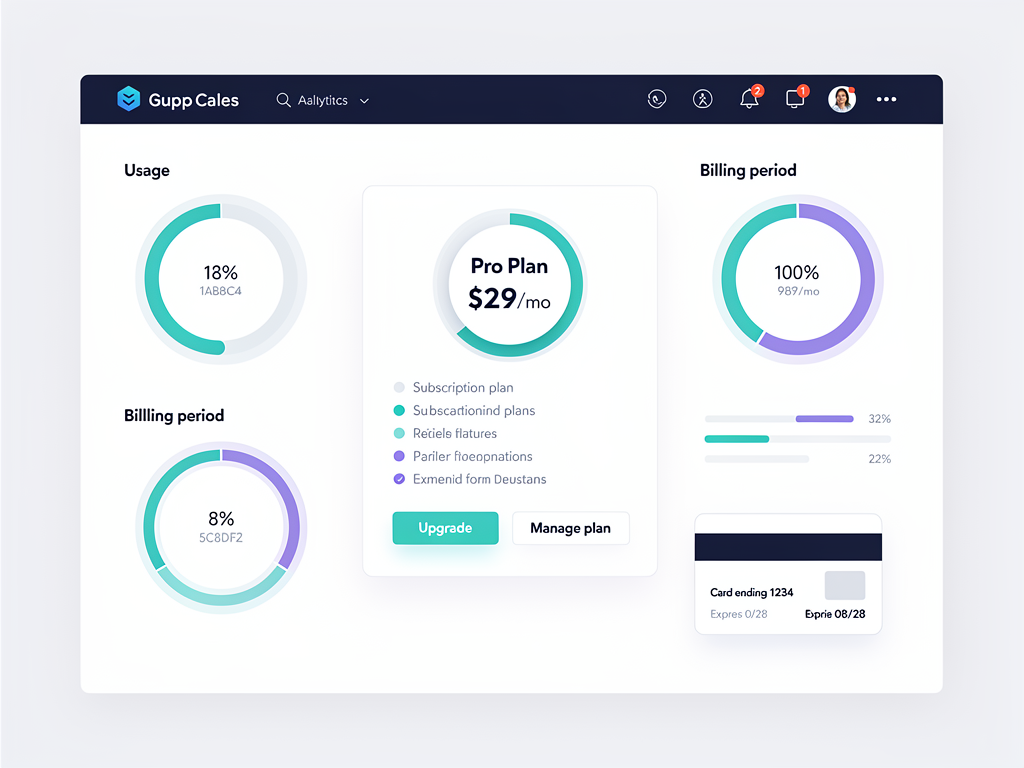
For more control over the user experience, you can build custom billing management interfaces using Stripe's API directly. This approach requires more development effort but allows you to integrate billing management seamlessly into your application's design. Query the customer's subscriptions, payment methods, and invoices to display in your custom UI.
When building custom interfaces, implement plan switching carefully. Stripe handles proration automatically when you update a subscription's price, but you should preview the proration amount before confirming the change. Display the prorated charge or credit clearly so customers understand what they will pay.
Handling Plan Upgrades and Downgrades
Plan changes are among the most complex subscription operations because they involve proration calculations, feature access changes, and potential billing adjustments. Your implementation must handle both immediate upgrades and scheduled downgrades gracefully.
For upgrades, customers typically expect immediate access to higher-tier features. Update the subscription in Stripe with the new price ID and set proration_behavior to "create_prorations". This charges the customer the difference between their current plan and the new plan for the remainder of the billing period:
| Proration Behavior | When to Use | Customer Experience |
|---|---|---|
| create_prorations | Standard upgrades | Charged difference immediately |
| none | Promotional upgrades | No additional charge until renewal |
| always_invoice | Immediate billing required | Invoice generated and charged now |
For downgrades, consider whether to apply the change immediately or at the end of the current billing period. Many SaaS products schedule downgrades for period end, allowing customers to use their paid features until their current period expires. Use the billing_cycle_anchor parameter to control when the new price takes effect.
Update your application database immediately when processing plan changes, but be aware that webhook confirmation may arrive later. Implement optimistic updates in your UI while waiting for webhook confirmation, but include fallback logic to handle cases where the Stripe API call succeeds but the webhook fails.
Best Practice: Always preview proration amounts before confirming plan changes. Use Stripe's upcoming invoice API to show customers exactly what they will be charged, reducing confusion and support requests.
Implementing Trial Periods and Freemium Models
Trial periods and freemium tiers are powerful conversion tools that let potential customers experience your product before committing to payment. Implementing these models requires careful consideration of feature gating, trial expiration handling, and conversion optimization.
For free trials, configure the trial period when creating the subscription. Stripe supports trials at both the subscription level and the price level. Subscription-level trials override price-level settings, giving you flexibility to offer different trial lengths for different customer segments:
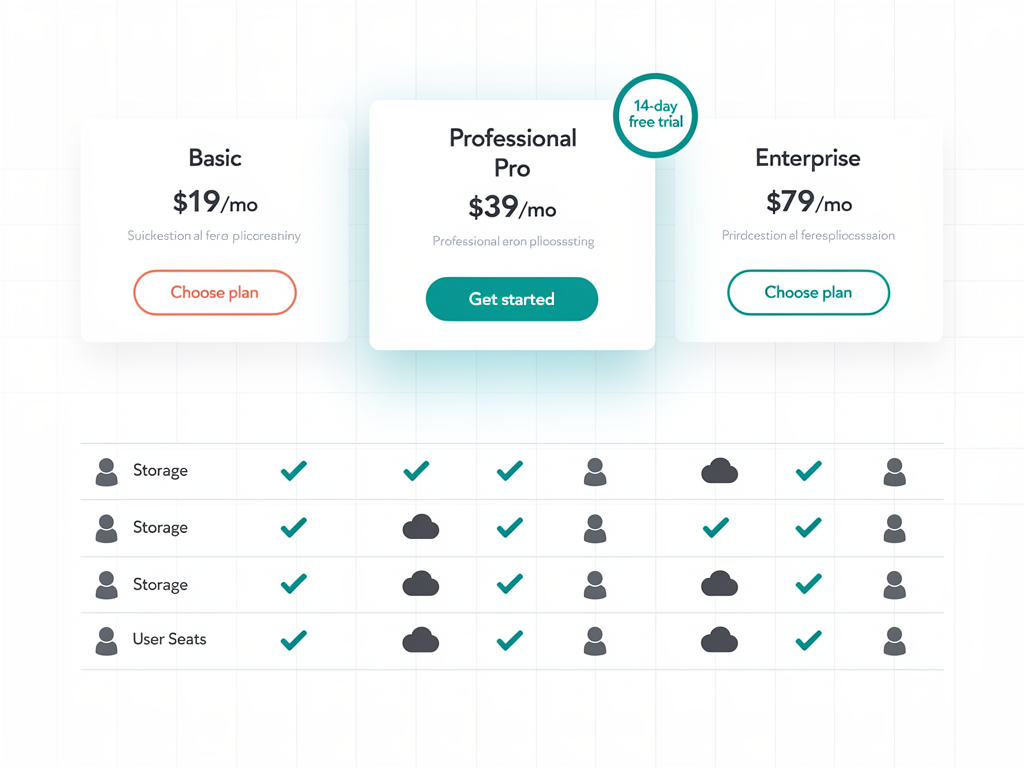
Track trial status in your application to display appropriate messaging. Show trial users how many days remain and what features they will lose if they do not convert. Send reminder emails as the trial end approaches, typically at 7 days, 3 days, and 1 day before expiration.
For freemium models, create a free plan in your database that does not require a Stripe subscription. Free users have limited access to features but can use your product indefinitely. When they are ready to upgrade, create a new subscription rather than modifying a non-existent one:
- Define clear feature limits for free plans (e.g., 3 projects, 100 API calls per month)
- Implement usage tracking to enforce limits and display current usage
- Show upgrade prompts when users approach or hit limits
- Allow seamless upgrades that preserve existing data and settings
Consider offering a payment method required trial versus a no card required trial. Requiring payment information upfront increases conversion rates but reduces trial signups. Test both approaches to find the right balance for your product and market.
Building Usage-Based and Metered Billing
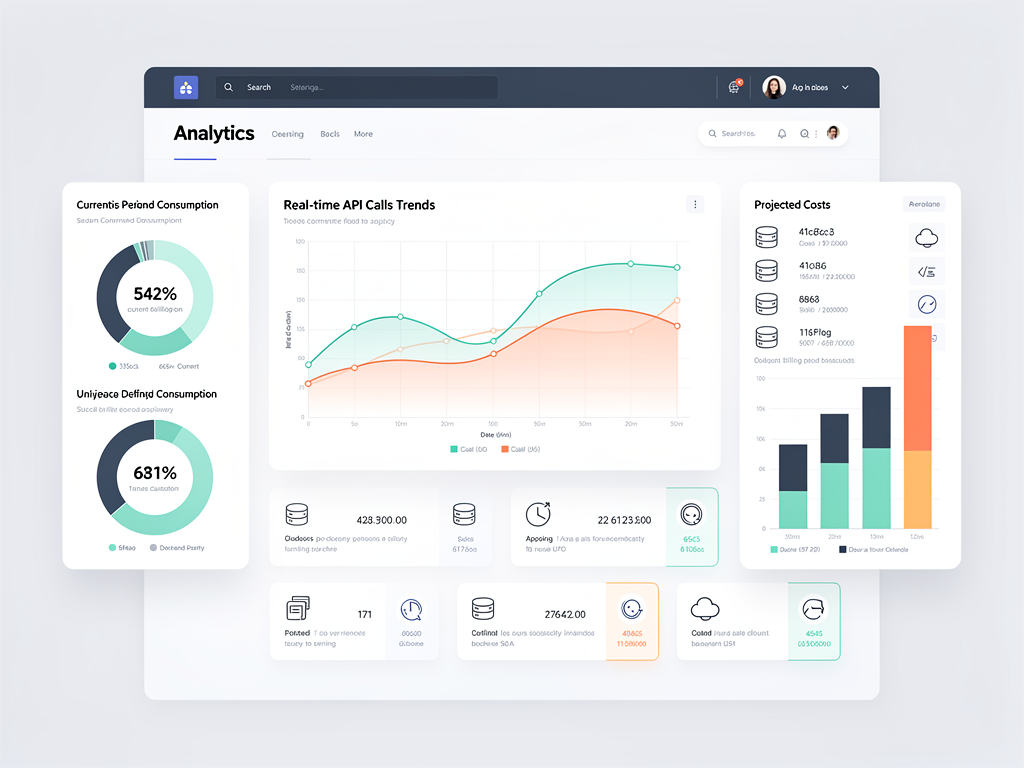
Usage-based billing charges customers based on their actual consumption rather than a flat monthly fee. This model works well for API products, infrastructure services, and applications where usage varies significantly between customers. Implementing metered billing requires real-time usage tracking and efficient aggregation.
Stripe supports usage-based billing through metered billing on subscription items. Create a price with a recurring interval and usage_type of "metered". Instead of charging a fixed amount, Stripe charges based on usage records you report throughout the billing period:
Design your usage tracking system to handle high volumes efficiently. Rather than making an API call to Stripe for every usage event, batch usage records and report them periodically. A common pattern is to track usage in your database or a time-series database, then sync totals to Stripe hourly or daily:
| Tracking Approach | Pros | Cons |
|---|---|---|
| Real-time Stripe reporting | Always accurate | High API volume, latency |
| Hourly batch sync | Balanced accuracy and efficiency | Slight delay in Stripe dashboard |
| Daily batch sync | Minimal API calls | Usage not visible until next day |
| End-of-period sync | Single API call | No mid-period visibility |
Implement usage alerts to notify customers when they approach spending thresholds. This prevents bill shock and builds trust. Allow customers to set their own spending limits and pause service if limits are exceeded, rather than accumulating unexpected charges.
Managing Failed Payments and Dunning
Payment failures are inevitable in subscription businesses. Credit cards expire, accounts have insufficient funds, and fraud detection systems block legitimate transactions. Your dunning (payment recovery) process determines how much revenue you recover from these failures.
Configure Stripe's Smart Retries to automatically retry failed payments at optimal times. Stripe's machine learning model analyzes patterns to determine when retries are most likely to succeed. Enable this feature in your Stripe Dashboard under Settings > Billing > Subscriptions.
Supplement automatic retries with customer communication. When a payment fails, send an email explaining the issue and providing a direct link to update their payment method. Your email should be helpful rather than threatening, as most failures are unintentional:
Email Best Practice: Include a one-click link to your billing portal in payment failure emails. Reducing friction in the update process significantly improves recovery rates. Avoid requiring customers to log in before updating their payment method.
Implement a grace period before restricting access. Most SaaS products allow 7 to 14 days for customers to resolve payment issues. During the grace period, display in-app notifications about the payment problem while maintaining full access. After the grace period, restrict access to paid features but preserve the customer's data.
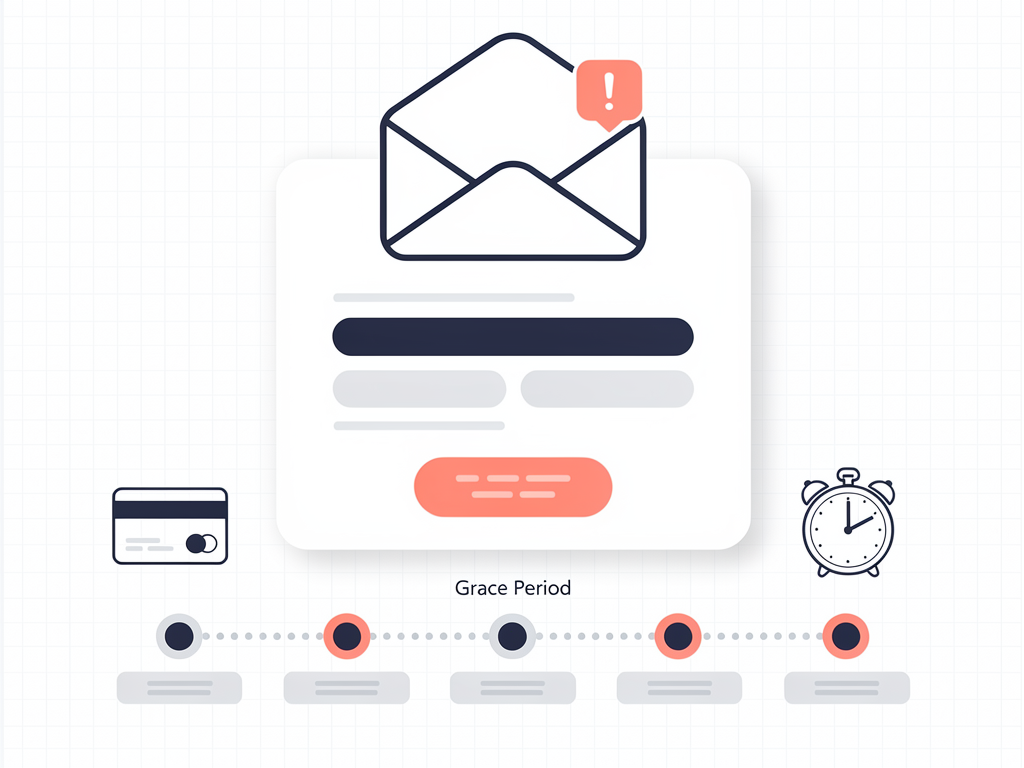
Track your dunning metrics to optimize recovery rates. Key metrics include initial failure rate, recovery rate by retry attempt, recovery rate by email, and involuntary churn rate. A/B test your dunning emails to improve messaging and timing.
Building Administrative Dashboards
Your internal team needs visibility into subscription metrics, customer accounts, and billing operations. An administrative dashboard provides this visibility and enables support staff to assist customers with billing issues without accessing Stripe directly.
Essential dashboard features include:
- Subscription overview: Total active subscriptions, MRR, and churn rate
- Customer search: Find customers by email, organization name, or subscription ID
- Subscription details: View and modify individual subscription status
- Invoice history: Access past invoices and payment records
- Refund processing: Issue full or partial refunds when appropriate
- Plan management: Create, modify, and deprecate subscription plans
Implement role-based access control for administrative functions. Support staff may need read access to customer data but should not process refunds without manager approval. Finance teams need access to revenue reports but not individual customer details. Define clear permission levels that match your organizational structure.
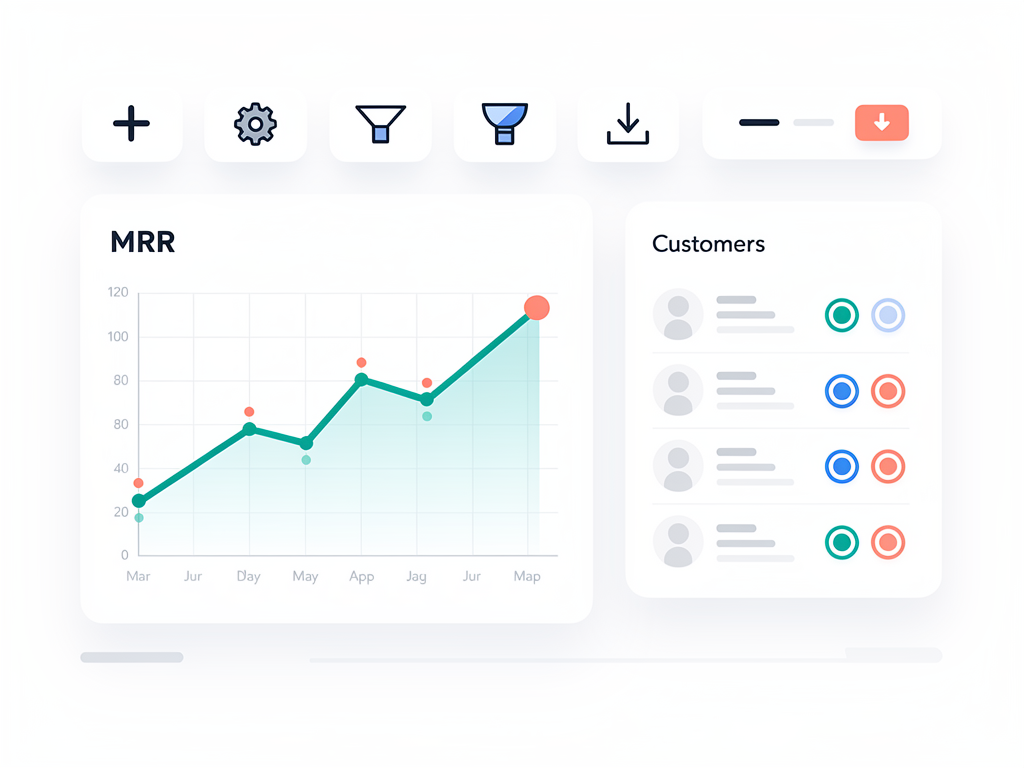
For startups and small teams, a SaaS starter kit or Next.js boilerplate with pre-built admin panels can save weeks of development time. Solutions like SaasCore provide complete admin dashboards alongside subscription management, allowing you to focus on your product's unique features rather than rebuilding common infrastructure.
Testing Subscription Flows Thoroughly
Subscription billing involves real money, making thorough testing essential before launch. Stripe provides a complete test mode environment with test card numbers and simulated webhook events. Use this environment to verify every subscription scenario before processing live payments.
Create a test checklist covering all subscription lifecycle events:
- New customer completes checkout successfully
- Existing customer upgrades to a higher plan
- Customer downgrades to a lower plan
- Customer cancels subscription (immediate and end-of-period)
- Customer reactivates canceled subscription
- Payment fails and retry succeeds
- Payment fails and subscription is canceled
- Customer updates payment method
- Trial expires and converts to paid
- Trial expires without payment method
Use Stripe's test card numbers to simulate different scenarios. Card number 4242424242424242 always succeeds, while 4000000000000341 attaches successfully but fails on the first charge. These test cards let you verify your error handling without risking real transactions.
Test your webhook handlers using the Stripe CLI. The CLI can forward webhooks from Stripe's test environment to your local development server, allowing you to debug webhook processing without deploying to a public URL. It can also trigger specific webhook events on demand for targeted testing.
Optimizing for Scale and Performance
As your subscriber base grows, subscription management operations must scale accordingly. Database queries, webhook processing, and usage tracking all face increased load. Design your system with scale in mind from the beginning to avoid painful migrations later.
Index your database tables appropriately. The subscriptions table should have indexes on organization_id, stripe_subscription_id, status, and current_period_end. These indexes support common queries like finding all active subscriptions, looking up subscriptions by Stripe ID, and identifying expiring subscriptions.
Implement caching for subscription data that does not change frequently. Cache plan details, feature flags, and subscription status with appropriate TTLs. Invalidate caches when webhooks indicate changes. Redis or similar in-memory stores provide sub-millisecond access to cached subscription data.
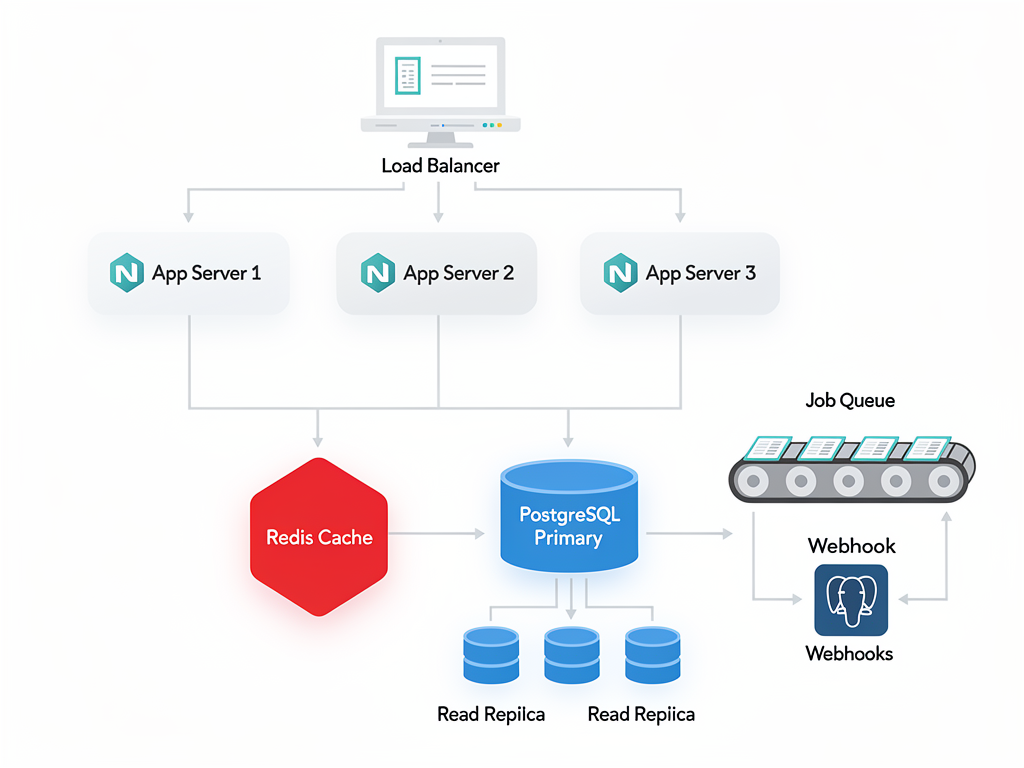
Process webhooks asynchronously using a job queue. When a webhook arrives, validate the signature and enqueue the event for processing, then return 200 immediately. A background worker processes the queue, handling retries and failures gracefully. This architecture prevents webhook timeouts and allows horizontal scaling of webhook processing.
Consider using a SaaS boilerplate or Next.js SaaS template that includes these scalability patterns out of the box. Building for scale from day one is significantly easier than retrofitting scalability into an existing codebase. The NextBuilder platform offers multi-tenant architecture patterns that handle subscription management at scale for no-code platform builders.
Security Considerations for Billing Systems
Billing systems handle sensitive financial data and require careful security practices. A breach could expose payment information, enable fraudulent transactions, or damage customer trust irreparably. Implement defense in depth with multiple security layers.
Never store raw credit card numbers in your database. Stripe handles PCI compliance by tokenizing payment methods. Your application only stores Stripe customer IDs and payment method IDs, which cannot be used to make charges without your API key.
Protect your Stripe API keys carefully. Store them in environment variables, never in code repositories. Use restricted API keys with minimal permissions for different parts of your application. Your webhook handler only needs permission to read events, while your checkout flow needs permission to create sessions.
Security Tip: Rotate your Stripe API keys periodically and immediately if you suspect compromise. Stripe allows you to create new keys before revoking old ones, enabling zero-downtime rotation.
Verify webhook signatures on every request. Attackers may attempt to send fake webhooks to grant themselves free access or manipulate subscription states. The signature verification step ensures only genuine Stripe webhooks are processed.
Implement audit logging for all billing operations. Record who performed each action, when it occurred, and what changed. This audit trail is essential for investigating disputes, detecting fraud, and maintaining compliance with financial regulations.
Conclusion
Building robust subscription management in Next.js requires attention to database design, payment integration, webhook handling, and user experience. The patterns and practices covered in this guide provide a solid foundation for launching and scaling your SaaS product's billing system.
Start with a well-designed database schema that supports your current needs while allowing for future growth. Integrate Stripe using Server Actions for secure, simplified billing logic. Build reliable webhook handlers with idempotency and error handling. Create self-service portals that empower customers to manage their own subscriptions.
Remember that subscription management is not a one-time implementation but an ongoing operational concern. Monitor your billing metrics, optimize your dunning process, and continuously improve the customer experience. The investment in solid billing infrastructure pays dividends through reduced churn, improved customer satisfaction, and predictable revenue growth.
Whether you build from scratch or leverage a SaaS template, the principles remain the same. Focus on reliability, security, and customer experience. Your billing system should be invisible when working correctly and helpful when issues arise. With the patterns described in this guide, you are well-equipped to build subscription management that scales with your business.
Frequently Asked Questions
How do I handle subscription cancellations gracefully?
Graceful cancellation handling involves both technical implementation and customer experience considerations. When a customer initiates cancellation, first determine whether they want immediate cancellation or cancellation at period end. Most SaaS products default to period-end cancellation, allowing customers to use their remaining paid time. In Stripe, set cancel_at_period_end to true rather than canceling immediately. Update your database to reflect the pending cancellation and display appropriate messaging in your UI. Send a confirmation email acknowledging the cancellation and inviting feedback. Consider implementing a cancellation flow that offers alternatives like plan downgrades, pauses, or discounts before finalizing. Track cancellation reasons to identify product issues driving churn. After the subscription ends, maintain the customer's data for a reasonable period in case they return.
What is the best way to sync subscription data between Stripe and my database?
The most reliable synchronization approach combines webhook-driven updates with periodic reconciliation. Webhooks provide real-time updates for subscription events, ensuring your database reflects changes within seconds. However, webhooks can occasionally fail or be delayed, so implement a daily reconciliation job that queries Stripe's API and compares subscription states with your database. For each subscription, verify that status, current period dates, and plan match between systems. Log discrepancies and either auto-correct them or flag them for manual review. Store the Stripe subscription ID in your database to enable direct lookups. Consider caching subscription data with short TTLs for performance while maintaining the database as the source of truth for authorization decisions. This hybrid approach provides both real-time responsiveness and data integrity guarantees.
How should I implement tiered pricing with feature gating?
Implement feature gating through a combination of database-stored plan configurations and application-level checks. Store each plan's feature flags and limits in your plans table as a JSONB column. When a user accesses a feature, query their current subscription's plan and check the corresponding feature flag. Create a centralized hasFeature or canAccess utility function that encapsulates this logic, making it easy to gate features throughout your application. For usage limits (like number of projects or API calls), track current usage in your database and compare against plan limits. Cache plan configurations and current usage to minimize database queries on every request. Display clear upgrade prompts when users attempt to access restricted features or approach limits. Consider implementing soft limits that warn users before hard limits that block access, improving the user experience while still enforcing plan boundaries.
What metrics should I track for subscription management?
Essential subscription metrics fall into three categories: revenue, retention, and operational health. For revenue, track Monthly Recurring Revenue (MRR), Annual Recurring Revenue (ARR), Average Revenue Per User (ARPU), and expansion revenue from upgrades. For retention, monitor churn rate (both voluntary and involuntary), net revenue retention, and customer lifetime value (LTV). Operational metrics include payment failure rate, dunning recovery rate, trial conversion rate, and time to first payment. Segment these metrics by plan tier, acquisition channel, and customer cohort to identify trends. Set up automated alerts for anomalies like sudden churn spikes or payment failure increases. Review metrics weekly to catch issues early and monthly to identify longer-term trends. These metrics inform product decisions, pricing changes, and operational improvements.
How do I migrate existing customers to new pricing plans?
Pricing migrations require careful planning to maintain customer trust and minimize churn. Start by deciding your migration strategy: grandfather existing customers on old pricing, migrate everyone to new pricing, or offer a transition period. For grandfathering, mark old plans as inactive for new signups while maintaining them for existing subscribers. For migrations, communicate changes well in advance (typically 30 to 90 days) and explain the value customers receive. Consider offering loyalty discounts or extended grace periods for long-term customers. Technically, create new plans in Stripe and your database, then update subscriptions in batches. Use Stripe's subscription schedule feature to apply changes at the next billing cycle rather than immediately. Monitor migration progress and customer feedback closely. Have support resources ready to handle questions and complaints. Document the migration thoroughly for future reference and compliance purposes.
Can I use multiple payment providers alongside Stripe?
Yes, supporting multiple payment providers is possible but adds significant complexity. Abstract your billing logic behind a provider-agnostic interface that defines common operations like creating subscriptions, processing payments, and handling cancellations. Each provider (Stripe, Lemon Squeezy, Paddle, etc.) implements this interface with provider-specific code. Store the payment provider identifier alongside each subscription in your database. Route webhook endpoints to the appropriate handler based on the source. Consider using a payment orchestration service if you need to support many providers. Common reasons for multiple providers include geographic coverage (some providers work better in certain regions), payment method support (like local payment methods), and merchant of record preferences for tax handling. Start with a single provider and add others only when specific business needs require them, as each provider adds maintenance overhead and potential failure points.
Ready to Launch Your SaaS Faster?
Building subscription management from scratch takes weeks of development time that could be spent on your core product. SaasCore provides a complete Next.js boilerplate with Stripe integration, webhook handling, customer portals, and admin dashboards already built and tested. Skip the boilerplate and ship your SaaS product faster. Try the demo today and see how much time you can save.
Subscribe to our newsletter
Subscribe to our newsletter and stay up-to-date with the latest news and updates.